Java NIO 网络编程实践聊天室:从入门到精通
在此之前,我们曾利用 Java 的套接字 Socket 和 ServerSocket 完成网络编程,但 Socket 和 ServerSocket 是基于 Java IO 的,在网络编程方面,性能会比较差。原因我们在之前也讲过。
那 Java NIO 的 SocketChannel 和 ServerSocketChannel 性能怎么样呢?
SocketChannel 和 ServerSocketChannel
在学习 NIO 的第一讲里,我们已经介绍过 SocketChannel 和 ServerSocketChannel了,这里再简单补充下。
ServerSocketChannel 用于创建服务器端套接字,而 SocketChannel 用于创建客户端套接字。它们都支持阻塞和非阻塞模式,通过设置其 blocking 属性来切换。阻塞模式下,读/写操作会一直阻塞直到完成,而非阻塞模式下,读/写操作会立即返回。
阻塞模式:
- 优点:编程简单,适合低并发场景。
- 缺点:性能较差,不适合高并发场景。
非阻塞模式:
- 优点:性能更好,适合高并发场景。
- 缺点:编程相对复杂。
我们来看一个简单的示例(阻塞模式下):
先来看 Server 端的:
public class BlockingServer {
    public static void main(String[] args) throws IOException {
        // 创建服务器套接字
        ServerSocketChannel serverSocketChannel = ServerSocketChannel.open();
        // 绑定端口
        serverSocketChannel.socket().bind(new InetSocketAddress(8080));
        // 设置为阻塞模式(默认为阻塞模式)
        serverSocketChannel.configureBlocking(true);

        while (true) {
            // 接收客户端连接
            SocketChannel socketChannel = serverSocketChannel.accept();
            // 分配缓冲区
            ByteBuffer buffer = ByteBuffer.allocate(1024);

            // 读取数据
            int bytesRead = socketChannel.read(buffer);
            while (bytesRead != -1) {
                buffer.flip();
                System.out.println(StandardCharsets.UTF_8.decode(buffer));
                buffer.clear();
                bytesRead = socketChannel.read(buffer);
            }
            // 关闭套接字
            socketChannel.close();
        }
    }
}
简单解释一下这段代码,也比较好理解。
首先创建服务器端套接字ServerSocketChannel,然后绑定 8080 端口,接着使用 while 循环监听客户端套接字。如果接收到客户端连接 SocketChannel,就从通道里读取数据到缓冲区 ByteBuffer,一直读到通道里没有数据,关闭当前通道。
其中 serverSocketChannel.configureBlocking(true) 用来设置通道为阻塞模式(可以缺省)。
再来看客户端的:
public class BlockingClient {
public static void main(String[] args) throws IOException {
// 创建客户端套接字
SocketChannel socketChannel = SocketChannel.open();
// 连接服务器
socketChannel.connect(new InetSocketAddress("localhost", 8080));
// 分配缓冲区
ByteBuffer buffer = ByteBuffer.allocate(1024);
// 向服务器发送数据
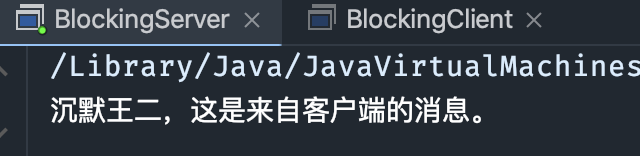
buffer.put("沉默王二,这是来自客户端的消息。".getBytes(StandardCharsets.UTF_8));
buffer.flip();
socketChannel.write(buffer);
// 清空缓冲区
buffer.clear();
// 关闭套接字
socketChannel.close();
}
}客户端代码就更简单了,建立通道 SocketChannel,连接服务器,然后在缓冲区里放一段数据,之后写入到通道中,关闭套接字。
先运行 BlockingServer,再运行 BlockingClient,可以在 Server 端的控制台收到以下信息。
好,我们再来看非阻塞模式下的示例。
先来看 Server 端:
public class NonBlockingServer {
    public static void main(String[] args) throws IOException {
        // 创建服务器套接字
        ServerSocketChannel serverSocketChannel = ServerSocketChannel.open();
        // 绑定端口
        serverSocketChannel.socket().bind(new InetSocketAddress(8080));
        // 设置为非阻塞模式
        serverSocketChannel.configureBlocking(false);

        // 创建选择器
        Selector selector = Selector.open();
        // 注册服务器套接字到选择器
        serverSocketChannel.register(selector, SelectionKey.OP_ACCEPT);

        while (true) {
            selector.select();
            Set<SelectionKey> selectedKeys = selector.selectedKeys();
            Iterator<SelectionKey> iterator = selectedKeys.iterator();

            while (iterator.hasNext()) {
                SelectionKey key = iterator.next();
                iterator.remove();

                if (key.isAcceptable()) {
                    // 接收客户端连接
                    SocketChannel socketChannel = serverSocketChannel.accept();
                    socketChannel.configureBlocking(false);
                    socketChannel.register(selector, SelectionKey.OP_READ);
                }

                if (key.isReadable()) {
                    // 读取数据
                    SocketChannel socketChannel = (SocketChannel) key.channel();
                    ByteBuffer buffer = ByteBuffer.allocate(1024);
                    int bytesRead = socketChannel.read(buffer);

                    if (bytesRead != -1) {
                        buffer.flip();
                        System.out.print(StandardCharsets.UTF_8.decode(buffer));
                        buffer.clear();
                    } else {
                        // 客户端已断开连接,取消选择键并关闭通道
                        key.cancel();
                        socketChannel.close();
                    }
                }
            }
        }
    }
}
与之前阻塞模式相同的,我们就不再赘述了,只说不同的。
①、首先,创建一个 ServerSocketChannel,并将其设置为非阻塞模式。
ServerSocketChannel serverSocketChannel = ServerSocketChannel.open();
serverSocketChannel.configureBlocking(false);
②、创建一个 Selector 实例,用于处理多个通道的事件。
Selector selector = Selector.open();③、将 ServerSocketChannel 注册到 Selector 上,并设置感兴趣的事件为 OP_ACCEPT。这意味着当有新的客户端连接请求时,Selector 会通知我们。
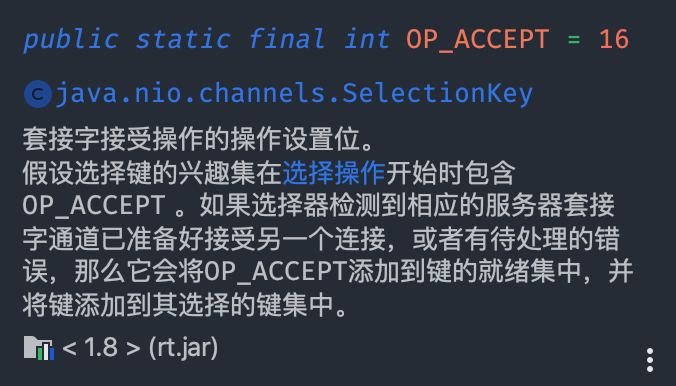
serverSocketChannel.register(selector, SelectionKey.OP_ACCEPT);看一下 OP_ACCEPT 的注释:
④、循环处理 Selector 中的事件。首先调用 selector.select() 方法来等待感兴趣的事件发生。这个方法会阻塞,直到至少有一个感兴趣的事件发生。
while (true) {
    int readyChannels = selector.select();
    if (readyChannels == 0) {
        continue;
    }
    // ...
}
⑤、当 selector.select() 返回时,我们可以通过 selector.selectedKeys() 获取所有已就绪的事件,并对其进行迭代处理。在处理事件时,根据 SelectionKey 的类型来执行相应的操作。
Set<SelectionKey> selectedKeys = selector.selectedKeys();
Iterator<SelectionKey> keyIterator = selectedKeys.iterator();
while (keyIterator.hasNext()) {
    SelectionKey key = keyIterator.next();
    // 处理事件
    // ...
    keyIterator.remove();
}
⑥、当 SelectionKey 的类型为 OP_ACCEPT 时,说明有新的客户端连接请求。此时,我们需要接受新的连接,并将新创建的 SocketChannel 设置为非阻塞模式。然后,将该 SocketChannel 注册到 Selector 上,并设置感兴趣的事件为 OP_READ。
if (key.isAcceptable()) {
    ServerSocketChannel server = (ServerSocketChannel) key.channel();
    SocketChannel client = server.accept();
    client.configureBlocking(false);
    client.register(selector, SelectionKey.OP_READ);
}
⑦、当 SelectionKey 的类型为 OP_READ 时,说明有客户端发送了数据。我们需要从 SocketChannel 中读取数据,并进行相应的处理。
if (key.isReadable()) {
    SocketChannel client = (SocketChannel) key.channel();
    ByteBuffer buffer = ByteBuffer.allocate(1024);
    int bytesRead = client.read(buffer);
    // 对读取到的数据进行处理
    // ...
}
⑧、(如果可以的话)当 SelectionKey 的类型为 OP_WRITE 时,说明可以向客户端发送数据。我们可以将要发送的数据写入 SocketChannel。
if (key.isWritable()) {
    SocketChannel client = (SocketChannel) key.channel();
    ByteBuffer buffer = ByteBuffer.wrap("你好,客户端".getBytes());
   client.write(buffer);
}
不过,本例中并没有这一步。如果需要的话,可以按照这样的方式向客户端写入数据。
⑨、在服务器停止运行时,需要关闭 Selector 和 ServerSocketChannel,释放资源。
key.cancel();
socketChannel.close();
好,接下来,我们来看客户端的。
public class NonBlockingClient {
    public static void main(String[] args) throws IOException {
        // 创建客户端套接字
        SocketChannel socketChannel = SocketChannel.open();
        // 设置为非阻塞模式
        socketChannel.configureBlocking(false);
        // 连接服务器
        socketChannel.connect(new InetSocketAddress("localhost", 8080));

        while (!socketChannel.finishConnect()) {
            // 等待连接完成
        }

        // 分配缓冲区
        ByteBuffer buffer = ByteBuffer.allocate(1024);

        // 向服务器发送数据
        String message = "你好,沉默王二,这是来自客户端的消息。";
        buffer.put(message.getBytes(StandardCharsets.UTF_8));
        buffer.flip();
        socketChannel.write(buffer);
        // 清空缓冲区
        buffer.clear();

        // 关闭套接字
        socketChannel.close();
    }
}
客户端代码依然比较简单,我们直接略过,不再解释。然后运行 Server,再运行 Client。可以运行多次,结果如下:

Scatter 和 Gather
Scatter 和 Gather 是 Java NIO 中两种高效的 I/O 操作,用于将数据分散到多个缓冲区或从多个缓冲区中收集数据。
Scatter(分散):它将从 Channel 读取的数据分散(写入)到多个缓冲区。这种操作可以在读取数据时将其分散到不同的缓冲区,有助于处理结构化数据。例如,我们可以将消息头、消息体和消息尾分别写入不同的缓冲区。
Gather(聚集):与 Scatter 相反,它将多个缓冲区中的数据聚集(读取)并写入到一个 Channel。这种操作允许我们在发送数据时从多个缓冲区中聚集数据。例如,我们可以将消息头、消息体和消息尾从不同的缓冲区中聚集到一起并写入到同一个 Channel。
来写一个完整的 demo,先看 Server。
// 创建一个ServerSocketChannel
ServerSocketChannel serverSocketChannel = ServerSocketChannel.open();
serverSocketChannel.socket().bind(new InetSocketAddress(9000));

// 接受连接
SocketChannel socketChannel = serverSocketChannel.accept();

// Scatter:分散读取数据到多个缓冲区
ByteBuffer headerBuffer = ByteBuffer.allocate(128);
ByteBuffer bodyBuffer = ByteBuffer.allocate(1024);

ByteBuffer[] buffers = {headerBuffer, bodyBuffer};

long bytesRead = socketChannel.read(buffers);

// 输出缓冲区数据
headerBuffer.flip();
while (headerBuffer.hasRemaining()) {
    System.out.print((char) headerBuffer.get());
}

System.out.println();

bodyBuffer.flip();
while (bodyBuffer.hasRemaining()) {
    System.out.print((char) bodyBuffer.get());
}

// Gather:聚集数据从多个缓冲区写入到Channel
ByteBuffer headerResponse = ByteBuffer.wrap("Header Response".getBytes());
ByteBuffer bodyResponse = ByteBuffer.wrap("Body Response".getBytes());

ByteBuffer[] responseBuffers = {headerResponse, bodyResponse};

long bytesWritten = socketChannel.write(responseBuffers);

// 关闭连接
socketChannel.close();
serverSocketChannel.close();
再来看 Client:
// 创建一个SocketChannel
SocketChannel socketChannel = SocketChannel.open();
socketChannel.connect(new InetSocketAddress("localhost", 9000));

// 发送数据到服务器
String header = "Header Content";
String body = "Body Content";

ByteBuffer headerBuffer = ByteBuffer.wrap(header.getBytes());
ByteBuffer bodyBuffer = ByteBuffer.wrap(body.getBytes());

ByteBuffer[] buffers = {headerBuffer, bodyBuffer};
socketChannel.write(buffers);

// 从服务器接收数据
ByteBuffer headerResponseBuffer = ByteBuffer.allocate(128);
ByteBuffer bodyResponseBuffer = ByteBuffer.allocate(1024);

ByteBuffer[] responseBuffers = {headerResponseBuffer, bodyResponseBuffer};

long bytesRead = socketChannel.read(responseBuffers);

// 输出接收到的数据
headerResponseBuffer.flip();
while (headerResponseBuffer.hasRemaining()) {
    System.out.print((char) headerResponseBuffer.get());
}

bodyResponseBuffer.flip();
while (bodyResponseBuffer.hasRemaining()) {
    System.out.print((char) bodyResponseBuffer.get());
}

// 关闭连接
socketChannel.close();
在这个示例中,我们使用了 Scattering 从 SocketChannel 分散读取数据到多个缓冲区,并使用 Gathering 将数据从多个缓冲区聚集写入到 SocketChannel。通过这种方式,我们可以方便地处理多个缓冲区中的数据。
异步套接字通道 AsynchronousSocketChannel 和 AsynchronousServerSocketChannel
AsynchronousSocketChannel 和 AsynchronousServerSocketChannel 是 Java 7 引入的异步 I/O 类,分别用于处理异步客户端 Socket 和服务器端 ServerSocket。异步 I/O 允许在 I/O 操作进行时执行其他任务,并在操作完成时接收通知,提高了并发处理能力。
来看一个简单的示例,先看服务器端。
public class AsynchronousServer {
public static void main(String[] args) throws IOException, InterruptedException {
AsynchronousServerSocketChannel server = AsynchronousServerSocketChannel.open();
server.bind(new InetSocketAddress("localhost", 5000));
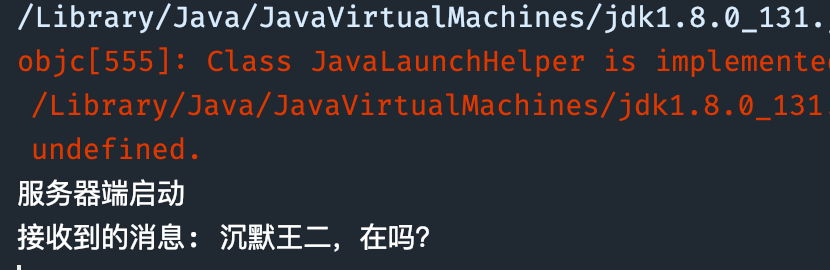
System.out.println("服务器端启动");
server.accept(null, new CompletionHandler<AsynchronousSocketChannel, Void>() {
@Override
public void completed(AsynchronousSocketChannel client, Void attachment) {
// 接收下一个连接请求
server.accept(null, this);
ByteBuffer buffer = ByteBuffer.allocate(1024);
Future<Integer> readResult = client.read(buffer);
try {
readResult.get();
buffer.flip();
String message = new String(buffer.array(), 0, buffer.remaining());
System.out.println("接收到的消息: " + message);
} catch (Exception e) {
e.printStackTrace();
}
}
@Override
public void failed(Throwable exc, Void attachment) {
exc.printStackTrace();
}
});
// 为了让服务器继续运行,我们需要阻止 main 线程退出
Thread.currentThread().join();
}
}代码结构和之前讲到的异步文件通道 AsynchronousFileChannel 比较相似,异步服务单套接字通道 AsynchronousServerSocketChannel 接收客户端连接,每当收到一个新的连接时,会调用 completed() 方法,然后读取客户端发送的数据并将其打印到控制台。
来简单分析一下吧。
①、创建了一个 AsynchronousServerSocketChannel 实例并将其打开。这个通道将用于监听客户端连接。
AsynchronousServerSocketChannel server = AsynchronousServerSocketChannel.open();②、调用 accept() 方法来接收客户端连接。这个方法需要一个 CompletionHandler 实例,当客户端连接成功时,completed() 方法会被调用。
server.accept(null, new CompletionHandler<AsynchronousSocketChannel, Void>() { ... });③、实现 CompletionHandler,I/O 操作成功时,会调用 completed() 方法;当 I/O 操作失败时,会调用 failed() 方法。
new CompletionHandler<AsynchronousSocketChannel, Void>() {
    @Override
    public void completed(AsynchronousSocketChannel client, Void attachment) { ... }

    @Override
    public void failed(Throwable exc, Void attachment) { ... }
}
在 completed 方法中,我们首先调用 server.accept() 来接收下一个连接请求。然后,我们创建一个缓冲区 ByteBuffer 并使用 client.read() 从客户端读取数据。在这个示例中,我们使用了一个 Future 对象来等待读取操作完成。当读取完成时,我们将缓冲区的内容打印到控制台。
④、为了让服务器继续运行并接收客户端连接,我们需要阻止 main 线程退出。
Thread.currentThread().join();再来看客户端的:
public class AsynchronousClient {

    public static void main(String[] args) {
        try {
            AsynchronousSocketChannel client = AsynchronousSocketChannel.open();
            Future<Void> connectResult = client.connect(new InetSocketAddress("localhost", 5000));
            connectResult.get(); // 等待连接完成

            String message = "沉默王二,在吗?";
            ByteBuffer buffer = ByteBuffer.wrap(message.getBytes(StandardCharsets.UTF_8));
            Future<Integer> writeResult = client.write(buffer);
            writeResult.get(); // 等待发送完成

            System.out.println("消息发送完毕");

            client.close();
        } catch (IOException | InterruptedException | ExecutionException e) {
            e.printStackTrace();
        }
    }
}
就是简单的连接和写入数据,就不多做解释了。这里先运行一下 Server 端,然后再运行一下客户端,看一下结果。
简单的聊天室
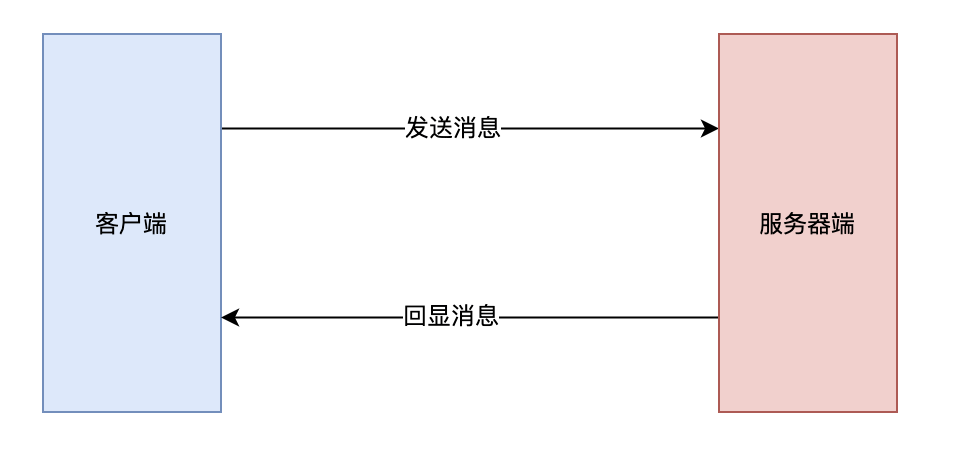
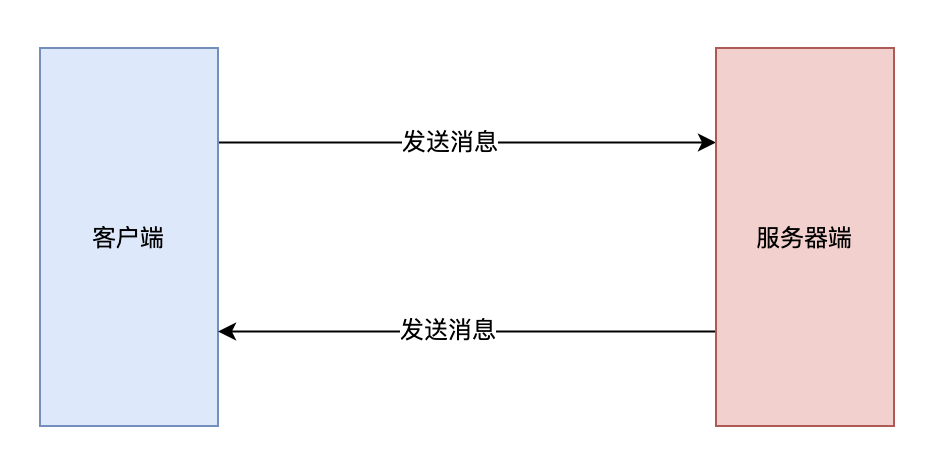
我们来通过 SocketChannel 和 ServerSocketChannel 实现一个 0.1 版的聊天室,先说一下需求,比较简单,服务端启动监听客户端请求,当客户端向服务器端发送信息后,服务器端接收到后把客户端消息回显给客户端,比较呆瓜,但可以先来看一下。
我们来看服务器端代码:
public class ChatServer {
    private Selector selector;
    private ServerSocketChannel serverSocketChannel;
    private static final int PORT = 8080;

    public ChatServer() {
        try {
            selector = Selector.open();
            serverSocketChannel = ServerSocketChannel.open();
            serverSocketChannel.socket().bind(new InetSocketAddress(PORT));
            serverSocketChannel.configureBlocking(false);
            serverSocketChannel.register(selector, SelectionKey.OP_ACCEPT);
            System.out.println("聊天室服务端启动了 " + PORT);
        } catch (IOException e) {
            e.printStackTrace();
        }
    }

    public void start() {
        try {
            while (true) {
                if (selector.select() > 0) {
                    Iterator<SelectionKey> iterator = selector.selectedKeys().iterator();
                    while (iterator.hasNext()) {
                        SelectionKey key = iterator.next();
                        iterator.remove();
                        handleKey(key);
                    }
                }
            }
        } catch (IOException e) {
            e.printStackTrace();
        }
    }

    private void handleKey(SelectionKey key) throws IOException {
        if (key.isAcceptable()) {
            SocketChannel socketChannel = serverSocketChannel.accept();
            socketChannel.configureBlocking(false);
            socketChannel.register(selector, SelectionKey.OP_READ);
            System.out.println("客户端连接上了: " + socketChannel.getRemoteAddress());
        } else if (key.isReadable()) {
            SocketChannel socketChannel = (SocketChannel) key.channel();
            ByteBuffer buffer = ByteBuffer.allocate(1024);
            int read = socketChannel.read(buffer);
            if (read > 0) {
                buffer.flip();
                String msg = new String(buffer.array(), 0, read);
                System.out.println("客户端说: " + msg);
                socketChannel.write(ByteBuffer.wrap(("服务端回复: " + msg).getBytes()));
            }
        }
    }

    public static void main(String[] args) {
        new ChatServer().start();
    }
}
解释一下代码逻辑:
1、创建一个 ServerSocketChannel,并将其绑定到指定端口。
2、将 ServerSocketChannel 设置为非阻塞模式。
3、创建一个 Selector,并将 ServerSocketChannel 注册到它上面,监听 OP_ACCEPT 事件(等待客户端连接)。
4、无限循环,等待感兴趣的事件发生。
5、使用 Selector.select() 方法,等待已注册的通道中有事件发生。
6、获取到发生事件的通道的 SelectionKey。
7、判断 SelectionKey 的事件类型:
- a. 如果是 OP_ACCEPT 事件,说明有新的客户端连接进来。接受新的连接,并将新连接的 SocketChannel 注册到 Selector 上,监听 OP_READ 事件。
- b. 如果是 OP_READ 事件,说明客户端发送了消息。读取客户端发送的消息,并将其返回给客户端。 处理完毕后,清除已处理的 SelectionKey。
再来看一下客户端的代码:
public class ChatClient {
    private Selector selector;
    private SocketChannel socketChannel;
    private static final String HOST = "localhost";
    private static final int PORT = 8080;

    public ChatClient() {
        try {
            selector = Selector.open();
            socketChannel = SocketChannel.open(new InetSocketAddress(HOST, PORT));
            socketChannel.configureBlocking(false);
            socketChannel.register(selector, SelectionKey.OP_READ);
            System.out.println("连接到聊天室了");
        } catch (IOException e) {
            e.printStackTrace();
        }
    }

    public void start() {
        new Thread(() -> {
            try {
                while (true) {
                    if (selector.select() > 0) {
                        for (SelectionKey key : selector.selectedKeys()) {
                            selector.selectedKeys().remove(key);
                            if (key.isReadable()) {
                                readMessage();
                            }
                        }
                    }
                }
            } catch (IOException e) {
                e.printStackTrace();
            }
        }).start();

        try (BufferedReader reader = new BufferedReader(new InputStreamReader(System.in
        ))) {
            String input;
            while ((input = reader.readLine()) != null) {
                sendMessage(input);
            }
        } catch (IOException e) {
            e.printStackTrace();
        }
    }
    private void sendMessage(String message) throws IOException {
        if (message != null && !message.trim().isEmpty()) {
            ByteBuffer buffer = ByteBuffer.wrap(message.getBytes());
            socketChannel.write(buffer);
        }
    }

    private void readMessage() throws IOException {
        ByteBuffer buffer = ByteBuffer.allocate(1024);
        int read = socketChannel.read(buffer);
        if (read > 0) {
            buffer.flip();
            String msg = new String(buffer.array(), 0, read);
            System.out.println(msg);
        }
    }

    public static void main(String[] args) {
        new ChatClient().start();
    }
}
解释一下代码逻辑:
1、创建一个 SocketChannel,并连接到指定的服务器地址和端口。
2、将 SocketChannel 设置为非阻塞模式。
3、创建一个 Selector,并将 SocketChannel 注册到它上面,监听 OP_READ 事件(等待接收服务器的消息)。
4、启动一个新线程用于读取用户在控制台输入的消息,并发送给服务器。
5、无限循环,等待感兴趣的事件发生。
6、使用 Selector.select() 方法,等待已注册的通道中有事件发生。
7、获取到发生事件的通道的 SelectionKey。
8、判断 SelectionKey 的事件类型:
- a. 如果是 OP_READ 事件,说明服务器发送了消息。读取服务器发送的消息,并在控制台显示。 处理完毕后,清除已处理的 SelectionKey。
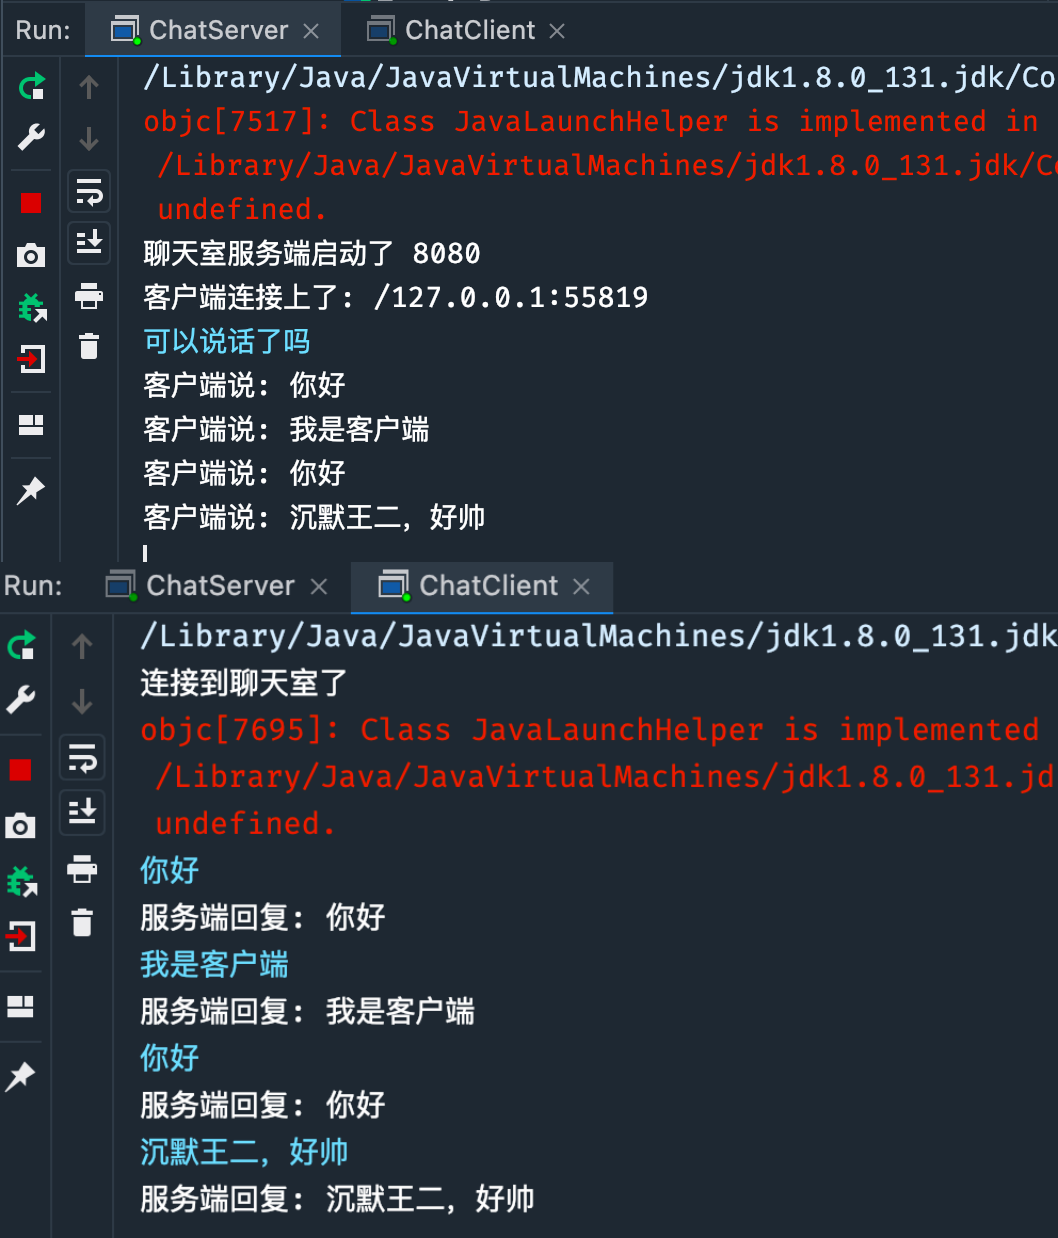
来看运行后的效果。
好,接下来,我们来升级一下需求,也就是 0.2 版聊天室,要求服务器端也能从控制台敲入信息主动发送给客户端。
来看服务器端代码:
public class Chat2Server {

    public static void main(String[] args) throws IOException {
        // 创建一个 ServerSocketChannel
        ServerSocketChannel serverSocketChannel = ServerSocketChannel.open();
        serverSocketChannel.configureBlocking(false);
        serverSocketChannel.bind(new InetSocketAddress(8080));

        // 创建一个 Selector
        Selector selector = Selector.open();
        serverSocketChannel.register(selector, SelectionKey.OP_ACCEPT);
        System.out.println("聊天室服务端启动了");

        // 客户端连接
        AtomicReference<SocketChannel> clientRef = new AtomicReference<>();

        // 从控制台读取输入并发送给客户端
        Thread sendMessageThread = new Thread(() -> {
            try (BufferedReader reader = new BufferedReader(new InputStreamReader(System.in))) {
                while (true) {
                    System.out.println("输入服务器端消息: ");
                    String message = reader.readLine();
                    SocketChannel client = clientRef.get();
                    if (client != null && client.isConnected()) {
                        ByteBuffer buffer = ByteBuffer.wrap((message + "\n").getBytes());
                        client.write(buffer);
                    }
                }
            } catch (IOException e) {
                e.printStackTrace();
            }
        });
        sendMessageThread.start();

        while (true) {
            int readyChannels = selector.select();

            if (readyChannels == 0) {
                continue;
            }

            Set<SelectionKey> selectedKeys = selector.selectedKeys();
            Iterator<SelectionKey> keyIterator = selectedKeys.iterator();

            while (keyIterator.hasNext()) {
                SelectionKey key = keyIterator.next();

                if (key.isAcceptable()) {
                    // 接受客户端连接
                    SocketChannel client = serverSocketChannel.accept();
                    System.out.println("客户端已连接");
                    client.configureBlocking(false);
                    client.register(selector, SelectionKey.OP_READ);
                    clientRef.set(client);
                } else if (key.isReadable()) {
                    // 读取客户端消息
                    SocketChannel channel = (SocketChannel) key.channel();
                    ByteBuffer buffer = ByteBuffer.allocate(1024);
                    int bytesRead = channel.read(buffer);

                    if (bytesRead > 0) {
                        buffer.flip();
                        byte[] bytes = new byte[buffer.remaining()];
                        buffer.get(bytes);
                        String message = new String(bytes).trim();
                        System.out.println("客户端消息: " + message);
                    }
                }
                keyIterator.remove();
            }
        }
    }
}
再来看客户端代码:
public class Chat2Client {
public static void main(String[] args) throws IOException {
// 创建一个 SocketChannel
SocketChannel socketChannel = SocketChannel.open();
socketChannel.configureBlocking(false);
socketChannel.connect(new InetSocketAddress("localhost", 8080));
// 创建一个 Selector
Selector selector = Selector.open();
socketChannel.register(selector, SelectionKey.OP_CONNECT);
// 从控制台读取输入并发送给服务器端
Thread sendMessageThread = new Thread(() -> {
try (BufferedReader reader = new BufferedReader(new InputStreamReader(System.in))) {
while (true) {
System.out.println("输入客户端消息: ");
String message = reader.readLine();
if (socketChannel.isConnected()) {
ByteBuffer buffer = ByteBuffer.wrap((message + "\n").getBytes());
socketChannel.write(buffer);
}
}
} catch (IOException e) {
e.printStackTrace();
}
});
sendMessageThread.start();
while (true) {
int readyChannels = selector.select();
if (readyChannels == 0) {
continue;
}
Set<SelectionKey> selectedKeys = selector.selectedKeys();
Iterator<SelectionKey> keyIterator = selectedKeys.iterator();
while (keyIterator.hasNext()) {
SelectionKey key = keyIterator.next();
if (key.isConnectable()) {
// 连接到服务器
socketChannel.finishConnect();
socketChannel.register(selector, SelectionKey.OP_READ);
System.out.println("已连接到服务器");
} else if (key.isReadable()) {
// 读取服务器端消息
ByteBuffer buffer = ByteBuffer.allocate(1024);
int bytesRead = socketChannel.read(buffer);
if (bytesRead > 0) {
buffer.flip();
byte[] bytes = new byte[buffer.remaining()];
buffer.get(bytes);
String message = new String(bytes).trim();
System.out.println("服务器端消息: " + message);
}
}
keyIterator.remove();
}
}
}
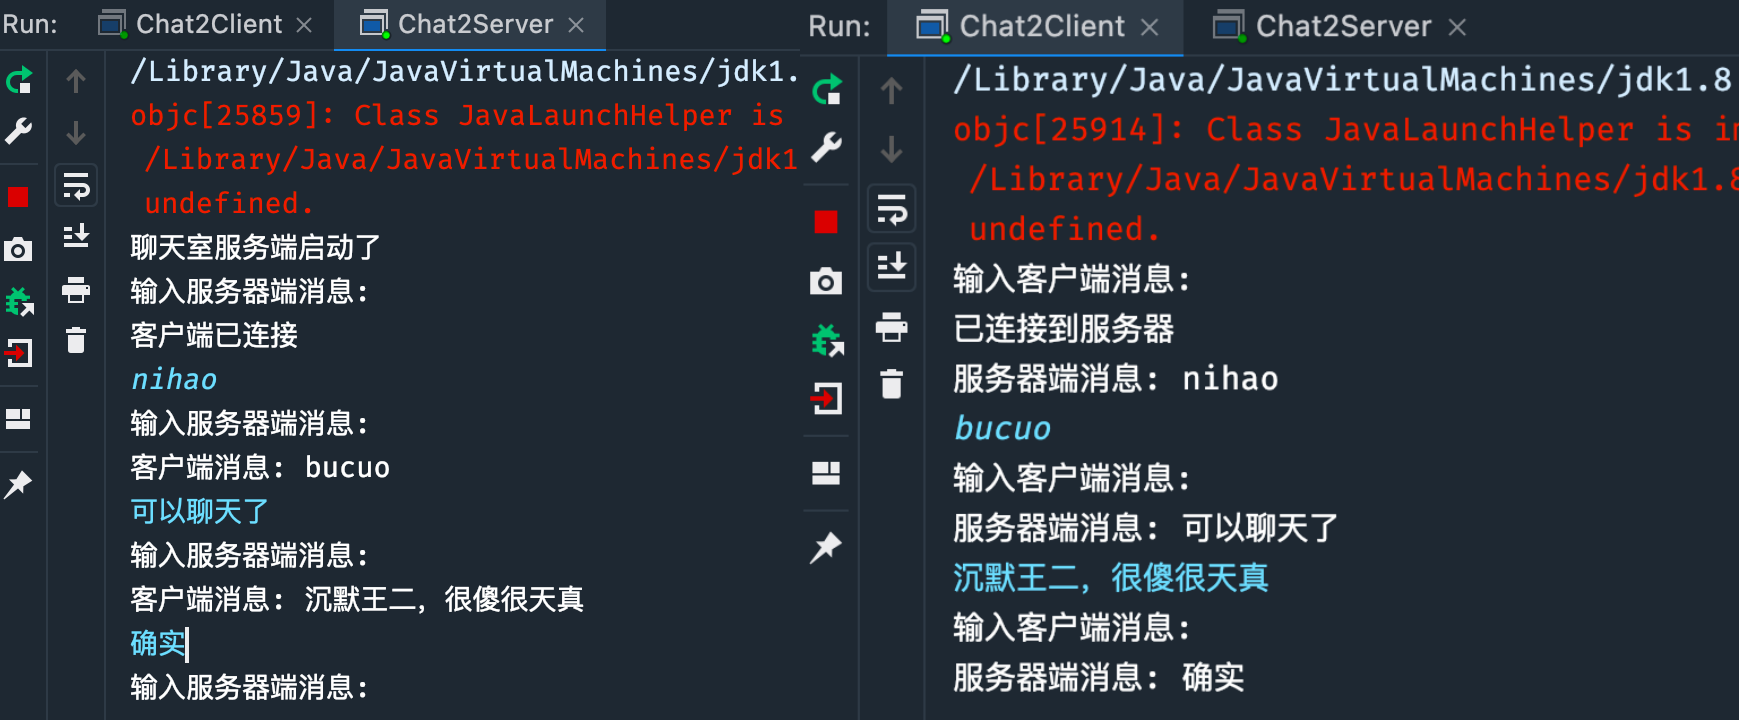
}运行 Server,再运行 Client,交互信息如下:
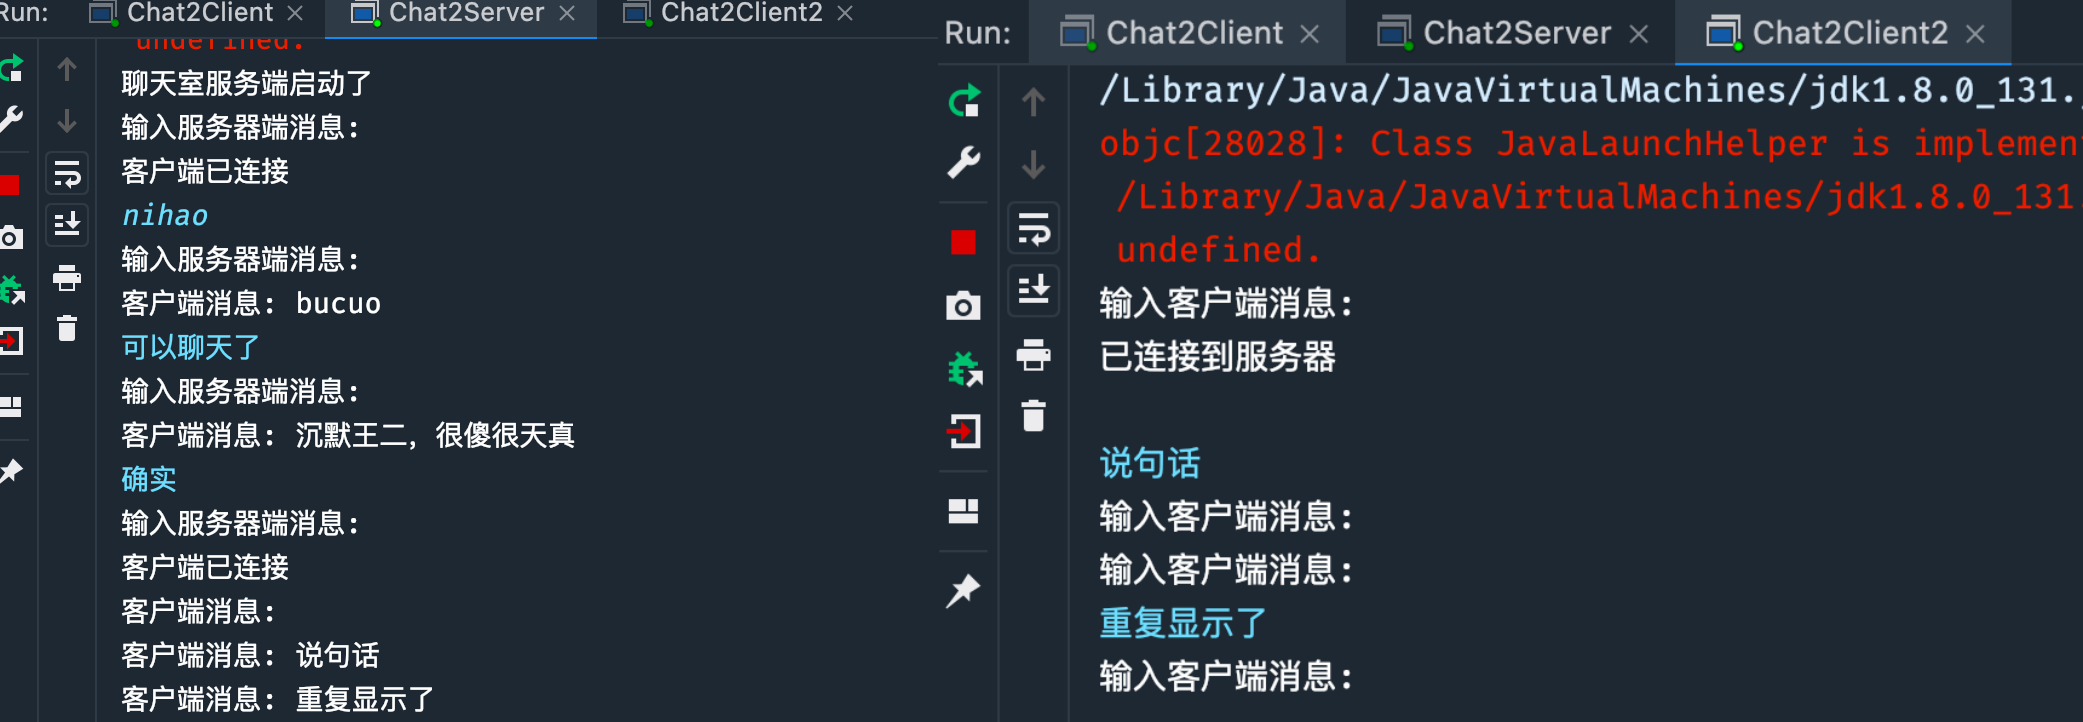
我们使用了 Selector 和非阻塞 I/O,这使得服务器可以同时处理多个连接。所以我们在 Intellij IDEA 中可以再配置一个客户端,见下图(填上这四项内容)。

然后启动,就可以完成一个 Server 和多个 Client 交互了。
OK,关于聊天室,我们就先讲到这里。
小结
前面我们了解到,Java NIO 在文件 IO 上的性能其实和传统 IO 差不多,甚至在处理大文件的时候还有些甘拜下风,但 NIO 的主要作用体现在网络 IO 上,像 Netty 框架底层其实就是 NIO,我们来做一下简单的总结吧。
SocketChannel(用于 TCP 连接)和 ServerSocketChannel(用于监听和接受新的 TCP 连接)可以用来替代传统的 Socket 和 ServerSocket 类,提供非阻塞模式。
NIO 支持阻塞和非阻塞模式。非阻塞模式允许程序在等待 I/O 时执行其他任务,从而提高并发性能。非阻塞模式的实现依赖于 Selector,它可以监控多个通道上的 I/O 事件。
NIO 支持将数据分散到多个 Buffer(Scatter)或从多个 Buffer 收集数据(Gather),提供了更高效的数据传输方式。
Java NIO.2 引入了 AsynchronousSocketChannel 和 AsynchronousServerSocketChannel,这些类提供了基于回调的异步 I/O 操作。异步套接字通道可以在完成 I/O 操作时自动触发回调函数,从而实现高效的异步处理。
最后,我们使用 NIO 实现了简单的聊天室功能。通过 ServerSocketChannel 和 SocketChannel 创建服务端和客户端,实现互相发送和接收消息。在处理多个客户端时,可以使用 Selector 来管理多个客户端连接,提高并发性能。
总之,Java NIO 网络编程实践提供了更高效、灵活且可扩展的 I/O 处理方式,对于大型应用程序和高并发场景具有显著优势。
GitHub 上标星 10000+ 的开源知识库《二哥的 Java 进阶之路》第一版 PDF 终于来了!包括Java基础语法、数组&字符串、OOP、集合框架、Java IO、异常处理、Java 新特性、网络编程、NIO、并发编程、JVM等等,共计 32 万余字,500+张手绘图,可以说是通俗易懂、风趣幽默……详情戳:太赞了,GitHub 上标星 10000+ 的 Java 教程
微信搜 沉默王二 或扫描下方二维码关注二哥的原创公众号沉默王二,回复 222 即可免费领取。
